Dear Fellow Foodies,
As of August 9th, Bam's Kitchen website has been moved to a new and improved site. Please visit my new website listed here for some new delicious meal ideas for you family.
http://bamskitchen.com/
In addition, there is a new Bam's Kitchen Facebook page and the link is...
http://www.facebook.com/pages/Bams-Kitchen/129787413780721?sk=wall
There is also a Bam's Kitchen Twitter page and the link is...
http://twitter.com/#!/bamskitchen
Looking forward to hearing from you.
Bobbi
Tuesday, August 9, 2011
Saturday, August 6, 2011
Garlic Glazed Grilled Turkey Breasts and Roasted Vegetables
"Garlic- Is there any other spice?"
This is a quote from my wise and eldest sister. This recipe is a tribute to her.
Growing up in Italian family, "Garlic" is a staple in the home and used in many dishes. Most days, we would start our cooking by putting a little olive oil and garlic in the pan and then figure out what we were going to make from there. Now that we have our own families, this tradition still remains part of our daily routine.
Garlic is an amazing spice and has many health benefits. For over 6,000 years, garlic has been used for both culinary and medicinal purposes. Garlic is native to central Asia, and has long been a staple in the Mediterranean region, as well as a frequent seasoning in Asia, Africa, and Europe. In many studies, garlic has been found to have antibacterial, antiviral, and antifungal activity. Garlic is also claimed to help prevent heart disease and cancer. Folklore states that garlic keeps vampires away and protects against evil eye so it has that going for it as well. The only downside of garlic is that it gives you halitosis (bad breath) if you eat a lot of it. However, if your family and friends are eating it along with you no one will even notice. Maybe the reason why eating garlic is antibacterial, anti-fungal and antiviral- it just keeps people at a distance. Whatever the reason, it wonderful natural preventative medicinal spice and really adds some wonderful flavors to many dishes.
Depending on whether garlic is raw, baked or fried it takes on different flavors depending on how it is prepared. It can have very strong flavor when it is raw but very sweet and mild when baked. In the Garlic Glazed Grilled Turkey breasts it will be used raw in the marinade and in the roasted vegetables it will be baked for a sweet and mild flavor.
Garlic Glazed Grilled Turkey Breasts


This is a quote from my wise and eldest sister. This recipe is a tribute to her.
 |
| Garlic Glazed Grilled Turkey Breast |
Garlic is an amazing spice and has many health benefits. For over 6,000 years, garlic has been used for both culinary and medicinal purposes. Garlic is native to central Asia, and has long been a staple in the Mediterranean region, as well as a frequent seasoning in Asia, Africa, and Europe. In many studies, garlic has been found to have antibacterial, antiviral, and antifungal activity. Garlic is also claimed to help prevent heart disease and cancer. Folklore states that garlic keeps vampires away and protects against evil eye so it has that going for it as well. The only downside of garlic is that it gives you halitosis (bad breath) if you eat a lot of it. However, if your family and friends are eating it along with you no one will even notice. Maybe the reason why eating garlic is antibacterial, anti-fungal and antiviral- it just keeps people at a distance. Whatever the reason, it wonderful natural preventative medicinal spice and really adds some wonderful flavors to many dishes.
Depending on whether garlic is raw, baked or fried it takes on different flavors depending on how it is prepared. It can have very strong flavor when it is raw but very sweet and mild when baked. In the Garlic Glazed Grilled Turkey breasts it will be used raw in the marinade and in the roasted vegetables it will be baked for a sweet and mild flavor.
Garlic Glazed Grilled Turkey Breasts
- 5 chopped garlic cloves (adjust more of less according to your taste)
- 2 pounds (approximately) Turkey breasts cut into into 1 inch fillets
- 1 teaspoon dried basil (or 1 tablespoon fresh basil chopped)
- 1/4 cup olive oil
- 1/4 soy sauce
- 2 tablespoons fresh lemon juice
- 1 tablespoons brown sugar

Step 1: Cut the turkey breasts in half so that it cooks evenly over grill.
Step 2: Marinate turkey breasts with garlic, soy sauce, basil, brown sugar and lemon juice for at least 1 hour but even better overnight. (Put in refrigerator)

Step 3: Take Turkey out of refrigerator and preheat grill to medium heat. (If you do not have a grill you can saute on top of stove or even bake in oven on 350 degrees F (176 C) for about 20-30 minutes until juices no longer run pink and internal temperature is 170 degree F (76 C.)
Step 4: Discard marinade and lightly oil grill plates and grill turkey breasts for about 6-8 minutes on each side or until internal temperature is 170 degrees F (76 C). (The length your grilling time depends on how thick your turkey breasts are. Therefore, you can reduce your cooking time if you cut up your turkey breasts lengthwise so turkey breasts are thiner and cook evenly on the grill)


Step 5: Take Garlic Glazed Turkey breasts off the grill and serve with roasted vegetables (recipe follows below)

Roasted Vegetables:

- 4-5 whole gloves of garlic still in peel
- 8 small carrots
- 3-4 shallots peeled and left whole
- 1 yam peeled and cubed (or any type root vegetables you like such as butternut squash, peppers zucchini, etc.)
- 10 mini yukon and/or red potatoes (or large potatoes cut in large cubes)
- olive oil for drizzling
- few sprigs of fresh thyme
- 1 tablespoon fresh chopped rosemary
- salt and fresh cracked pepper to taste
Step 1: Preheat oven to 350 degrees F (176 C)
Step 2: Place chopped vegetables, potatoes, herbs, garlic, onions, and carrots on baking sheet.
Drizzles with olive oil and salt and pepper and mix ingredients right on the baking sheet.

Step 3: Place vegetables in oven and cook for about 1 hour or until fork tender turning every 15 minutes.
Step 4: Remove vegetables from oven and serve with garlic glazed grilled turkey breasts or any main course and enjoy.

Thursday, August 4, 2011
Bam's Berry Smoothie Blasts
Do you want your kids/teenagers/family to eat more healthy fruits with vitamin C and milk products for growing bones? Do you think they would actually sit down to a breakfast of yogurt, topped with fruit and a high fiber cereal? Yeah right!!!!
Here is a plan that will actually get them to love their fruits and yogurt in the disguise of a creamy ice-cold berry smoothie. You can trick your kids into some healthy options and they will “think” they are eating ice cream. It’s a win-win situation. Smoothies are an easy way to get some breakfast into our busy schedules or as an easy healthy snack. They are also perfect to cool down on these hot and steamy summer days. Smoothies are very delicious but also very cold so beware of "Brain Freeze" if you sip on them too quickly.
We missed out on our usual 4th of July celebration at Camp Critters in Northern Michigan this summer which is full of fun and easy camp foods for the kids, fireworks and of course a big parade in red, white and blue. As a tribute to my dear friends and their 3 lovely children this Bam’s Berry Smoothie Blast is for you.

White= Vanilla Yogurt
Blue= Blueberries
A very famous desert chain store in Hong Kong is "Hui Lao Shan" ( 许留山 ). 许留山 is famous for is their mango smoothies and mangoes in all sorts of forms including pudding, ice cream, jelly or even get a medley of different fruits and dessert toppings with the mango. My favorite item on their menu is a mango glutinous rice ball with fresh mangoes; tiny rice balls with sweet mango purée; and a scoop of mango sorbet. Although I’m still questioning the idea of a “healthy dessert,” Hui Lau Shan did not disappoint, and I would definitely go back again and it is a must do if you happen to land in Hong Kong during your world travels.
A very famous desert chain store in Hong Kong is "Hui Lao Shan" ( 许留山 ). 许留山 is famous for is their mango smoothies and mangoes in all sorts of forms including pudding, ice cream, jelly or even get a medley of different fruits and dessert toppings with the mango. My favorite item on their menu is a mango glutinous rice ball with fresh mangoes; tiny rice balls with sweet mango purée; and a scoop of mango sorbet. Although I’m still questioning the idea of a “healthy dessert,” Hui Lau Shan did not disappoint, and I would definitely go back again and it is a must do if you happen to land in Hong Kong during your world travels.
Bam’s Berry Smoothie Blasts- (Serves 2 teenagers as a snack or 2 adults for breakfast)
- 8 ounces vanilla yogurt or any flavor you wish (try to purchase yogurts with natural acidophilus)
- 1 cup fruit – (berries work best such as blueberries, strawberries or any fruit you like such as raspberries, bananas, mangos, blackberries, kiwi, pineapple, etc. to equal a total of 1 cup)
- 1 ½ cup ice
- 2 tablespoons honey
- Juices of 2 fresh oranges

Step 1: Cut oranges in half and squeeze out juice


Step 2: Add the other berries to the blender


Step 4: Add yogurt

Step 5: Add honey and blend (taste and check for consistency and add more ice if want thicker and add more honey if want sweeter)


Step 6: Pour into glass and garnish with fruit and a straw- Enjoy!


Monday, August 1, 2011
Chicago Style Deep Dish Pizza
Weekends are for having fun and for eating fun food---PIZZA.
 Friday nights were "Boomers" Pizza Nights back in the world. "Boomers Party Store and Pizza" is this little unassuming convenience store that has everything from groceries, beer, bait and the best pizza you have ever had. My family thinks it is in the alkalinity of the well water that makes the crust so delicious. I think it is their homemade sauce and garlic buttery crust. Whatever the reason, if you ever stray to Brighton in your world travels a must stop is Boomers Party Store and Pizza located at 8999 Hamburg Rd, Brighton, MI 48116.
Pizza in Italian is the word for pie. Pizza was a yummy treat that first invented in Naples around the medieval times and is generally made with a thin crust with tomato sauce, cheese and toppings baked in a stone oven. Pizza came to America with Italian immigrants of the 19th century but has enjoyed its American boom principally since World War ll. It first became popular in port cities like New York and San Francisco, gradually moving inland until today it is featured at more than 15,000 pizzerias from Boston to San Diego – even in Hawaii. It is more popular in America than in Italy, where it is most frequently served as an appetizer. However, the Chicago-style "deep-dish" pizza was invented at Pizzeria Uno, in Chicago, Illinois in 1943 by Rudy Malnati. Chicago style deep dish pizza is an amazing invention with a thick deep crust, about 1 pound of mozzarella cheese, tomato sauce, and all of the fixings in a deep dish pan. This little creation must be eaten with a knife and fork and not with your hands because of all the delicious overflow of toppings.
Making Chicago Style Deep Dish Pizza with friends and family is an easy and fun activity to do together. To my dear Pine Valley Athletic Club members this is a tribute to you.
Chicago Style Deep Dish Pizza
As the goal of the weekend is to have fun I have used some easy prep/ pre-made ingredients so you can have more time enjoying family and friends and less time laboring in the kitchen.
- 1 cast iron pan or deep dish pan- greased
- 2 packages of pre-made pizza crust (made according to directions)
- 1 (15 ounces) jar pizza sauce
- 6 ounces thinly sliced pepperoni (or any other toppings you wish like cooked italian sausage, olives, green peppers, onions, mushrooms- whatever you wish)
- 16 ounces (approximately 4 cups) shredded mozzarella cheese
- 2 tablespoons olive oil
- garlic powder (optional)
- 1 teaspoon dried oregano
- parmesan cheese (optional)

Step 1: Preheat oven to 475 F (246 C) and invite your friends and family into the kitchen to help with the fun preparation.
Step 2: Make 2 pre-made pizza crusts with warm water and follow directions on package


Step 3: Let pizza dough rest for 5 minutes covered and then work the dough


Step 4: Grease iron skillet with olive oil
Step 5: Place pizza dough in iron skillet and spread out evenly on bottom and sides of pan.


Step 6: Add 1/3 of the mozzarella cheese directly on top of dough

Step 7: Add 1/2 the pepperoni or 1/2 of any toppings you wish

Step 8: Add 1/2 pizza sauce and spread evenly on top
Step 9: Repeat steps by adding 1/3 mozzarella cheese, the other half of pepperoni, sprinkle of dried oregano, parmesan cheese, or any other toppings, and the last half of the pizza sauce.

Step 10: Final topping is the last 1/3 of mozzarella cheese or as needed to completely cover the top of pizza


Step 11: Very lightly brush side top crusts with small amount olive oil and shake on small amount of garlic powder- optional.
Step 12: Put Chicago Style Deep Dish Pizza in oven for about 30 minutes. (if top or sides of pizza start to brown too quickly tent over a piece of aluminum foil to prevent burning.)

Step 13: Take pizza out of oven, let set for 5 minutes to rest, then take sharp knife and run around the edges of the crust.

Step 14: Cut into pizza wedges with fork and knife and enjoy. One piece of Chicago Style Deep Dish Pizza is very filling and along with a nice tossed salad makes a very delicious and fun weekend meal.

Saturday, July 30, 2011
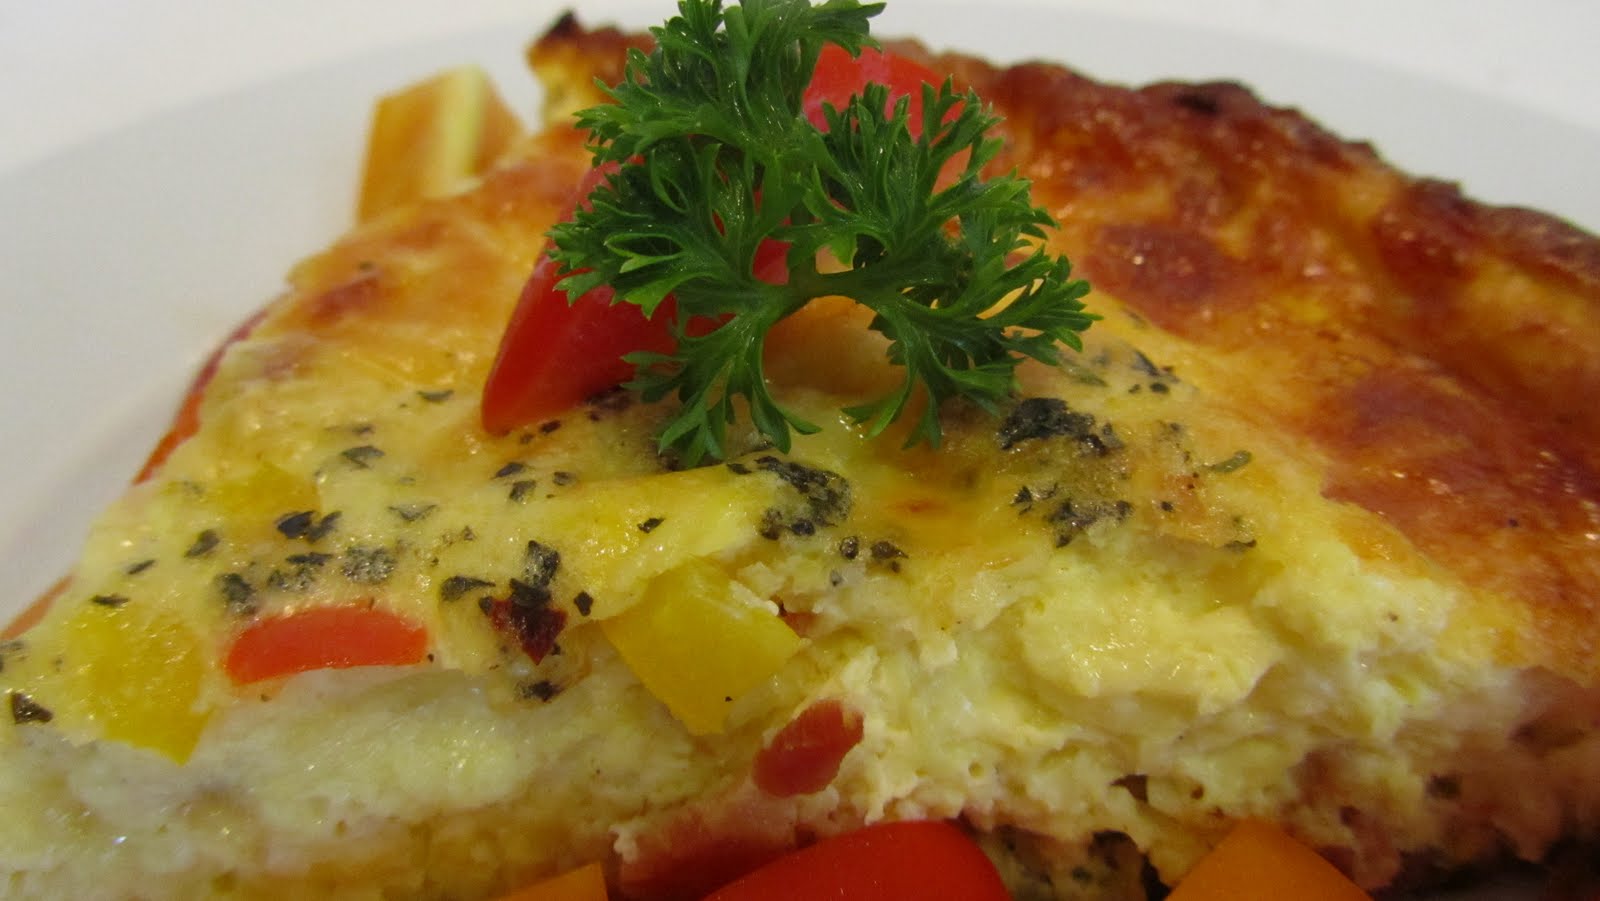
Bam's Breakfast Frittata
When you are in need of a make ahead easy and yummy breakfast dish, a breakfast frittata is the perfect solution. A breakfast frittata is a delicious substantial breakfast that will keep your teenagers and the rest of the family full and happy until the next meal.
 A breakfast frittata is a dynamic dish that you can put anything in it that you like. Most generally the main ingredients of a breakfast frittata are eggs, milk, cheese, and you may add any vegetables, herbs, breads, potatoes, left over pastas, breakfast meats or anything you desire. You can even make 1/2 dish one way with some ingredients and the other 1/2 dish with other ingredients, so you are sure to make everyone in the family is happy- even those picky eaters. However as a mom, my most favorite reason to choose a breakfast frittata is that you can make the preparations in advance and just cook the day of, so you can enjoy your morning out of the kitchen.


The word “frittata,” which derives from the Italian verb “friggere,” which means to fry. A frittata is like an open faced omelette. Traditionally in Italy a frittata was a way to use up those left overs in the fridge and use the base of the egg to hold it all together. Frittatas are usually eaten for breakfast but can also be eaten for brunches and lunches and even at room temperature with a nice salad on the side. A breakfast frittatas is a delicious comfort food that our family enjoys over lazy weekend mornings. Delizioso!!
Bam's Breakfast Frittata: (serves 2 hungry teenager boys or 4 adults)


Bam's Breakfast Frittata: (serves 2 hungry teenager boys or 4 adults)
- 8 eggs beaten (or egg beaters)
- 1 cup milk (can use skim, whole, soy, cream or whatever you have)
- 1 cup cheese (mozzarella, cheddar, goat, feta, ricotta, cream cheese- or whatever your family likes)
- 1 cup cooked breakfast meats- optional (bacon, sausage, ham, etc)
- 1 cup assorted vegetables-optional (if you can get your kids to eat vegetables)- peppers, onions, spinach, mushrooms, grated potatoes
- salt and pepper to taste
- 1/2 teaspoon dried mustard
- 1/4 teaspoon dried hot pepper flakes- optional
- 1 teaspoon chopped fresh basil- optional
- 2 teaspoons chopped chives- optional
- 1 teaspoon olive oil

There are many flavor combinations for frittatas. If you have a large pan, you can make one side of dish a kid friendly combination and one side of the dish for the adults. Here are some of our families favorites.
1) Cheddar cheese and spicy sausage
2) Feta and spinach
3) Ham, mozzarella cheese, chives and peppers
4) Tomato, basil, cream cheese
5) Bacon and potato- (for this one you cook bacon first and remove from pan and add shredded potatoes and pan fry until a nice golden crust on potatoes then add egg ingredients and bacon bacon into the pan and finish in oven)
There are 2 ways to make a breakfast frittata.
Prep in advance: One way is to make and prep all the ingredients the night before and then place into a greased oven proof dish and put in fridge overnight, covered in saran wrap. In morning, take out dish from refrigerator about 45 minutes in advance to allow to come to room temperature while preheating oven to and bake at 350 degrees F ( 176 C) for about 45-1 hour until knife comes out clean. (Allowing the dish to come to room temperature prevents the dish from breaking due to the temperature difference between cold dish and hot oven)
Prep and cook the day of: Prep all of your items and put in an iron skillet and cook on top of stove until just starts to set then transfer to 350 degrees F ( 176 C) over for about 45- 50 minutes or until knife comes out clean.
I will demonstrating the prep and cook the day of option as the iron skillet has a nice rustic presentation and makes a nice crispy crust and soft and fluffy egg inside.
Step 1: If you wish to use any breakfast meets such as bacon, sausage, ham etc,- chop up and add to skillet and cook on medium heat until golden brown. Then remove breakfast meats and place on plate lines with paper towels and set aside. Drain pan of excess fat/oil, but leave one teaspoon oil in pan to cook the frittata.


Step 2: Preheat oven to 350 degrees F (176 C)
Step 3: Beat eggs and add salt and pepper, milk, dry mustard, dried pepper flakes and any fresh spices or herbs you wish.

Step 4: Chop vegetables and prepare them to add to the frittata

Step 5: If you choose not to use breakfast meats, then now add 1 teaspoon of olive to coat pan to prevent the frittata from sticking to pan. Place skillet on medium heat on top of stove.
Step 6: Add egg mixture to pan- Do Not Stir- leave set.

Step 7: Add cheese, vegetables, breakfast meats and other items as you wish and let cook undisturbed on top of stove for about 2-3 minutes so that a nice crust forms on the bottom of pan.

Step 8: Transfer breakfast frittata to oven and cook for about 45-50 minutes until the knife comes out clean and the frittata is lightly browned and puffed.

Step 9: Take a sharp knife and run it around the edges of the pan. Cut into pie wedges and enjoy with fruit and toast for breakfast or a nice salad if serving for brunch or lunch. Enjoy!


Subscribe to:
Posts (Atom)